
")


Pinterest can be a great source of traffic for your blog or website, but did you know that you can increase that traffic even more by using Rich Pins? In this article, we’ll discuss what Rich Pins are and how to enable them on your Pinterest account in 3 simple steps.
So read on to find out more!
1. What are Rich Pins, and why should you use them on Pinterest
Rich Pins are basically your normal Pins “enriched” with more information. You are providing Pinterest with additional information and context, which is then additionally shown on your Pin! If you want to, you can read even more about this on Pinterest’s Business Site here!
Now, this additional information helps Pinterest and users to better categorize and understand your Pin. As Pinterest is always trying to display the most relevant Pins to people searching stuff on the Pinterest Smart Feed, you can see how activating this feature helps everybody!
As an FYI, all my viral and top-performing Pins are “Rich Pins,” and using my how-to set up Rich Pins Guide below, you will have this set up in no time at all (3min tops, promise!)
Benefits of using Rich Pins
There are several benefits of using Rich Pins, but these are my top 5:
- Makes your Pins more “clickable,” as the extra information encourages users to click through
- Helps you to track your Pins and analyze their performance better (more on that later)
- Helps Pinterest and users to better categorize and understand your Pin
- Increases the chances of your Pin being seen and repinned
- Adds a nice visual touch to your Pins!
2. How do you enable Rich Pins on WordPress
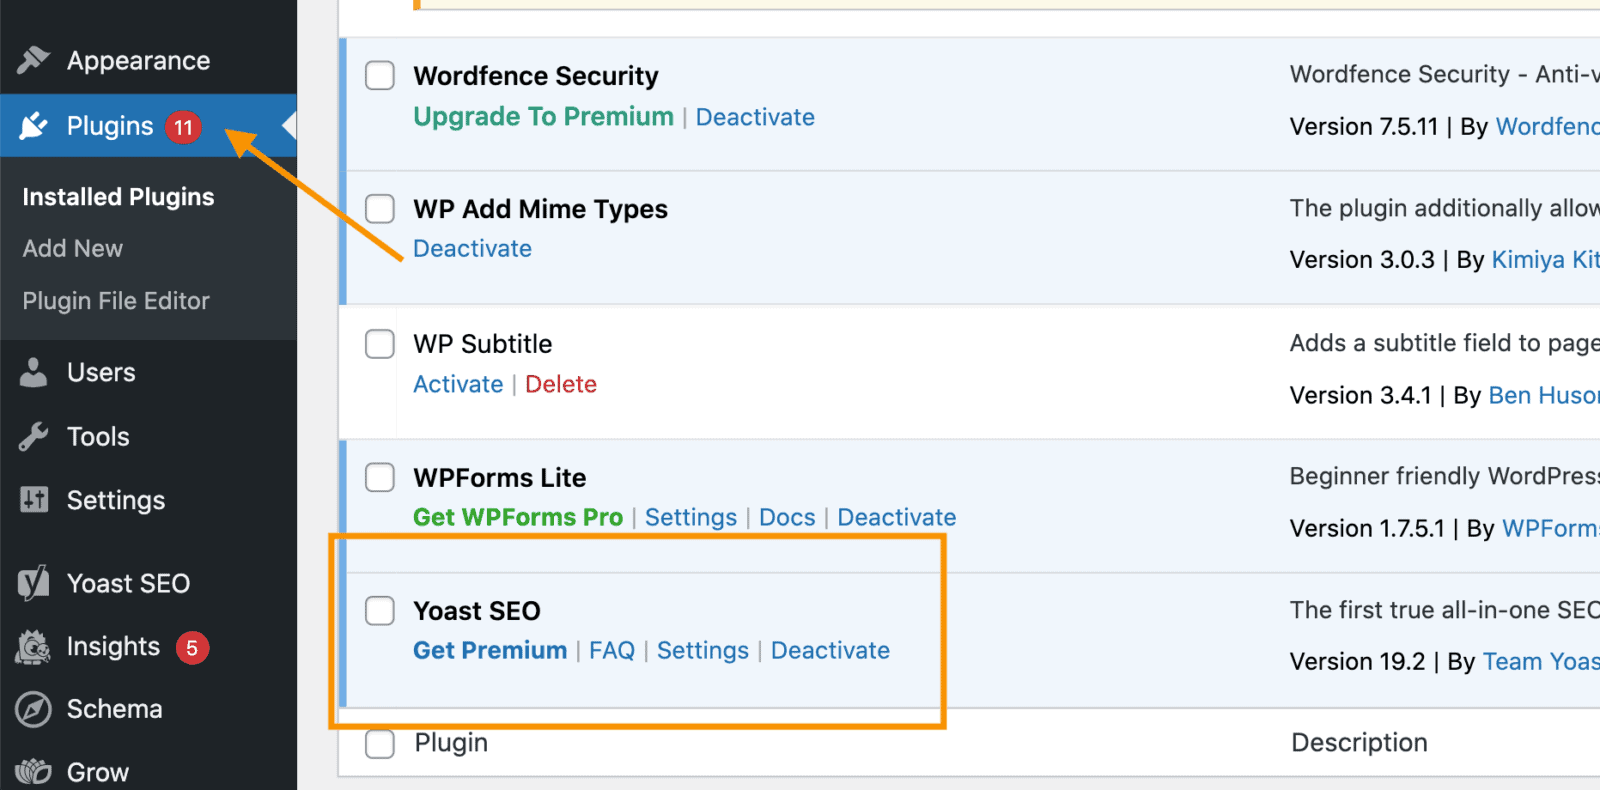
1. INSTALL YOAST SEO PLUGIN
The Yoast SEO Plugin is my favorite SEO Tool ever! It’s honestly a live saver in so many Blogger Situations I can’t even begin to say how much I love this little plugin (yes, I can YOU ROCK).
As Pinterest requires meta tags to be found on your site to authenticate, you will need to Install the SEO Plugin.
For this go to your WordPress Dashboard:
> Plugins > Add New > search for YOAST SEO > click Install > Click Activate!
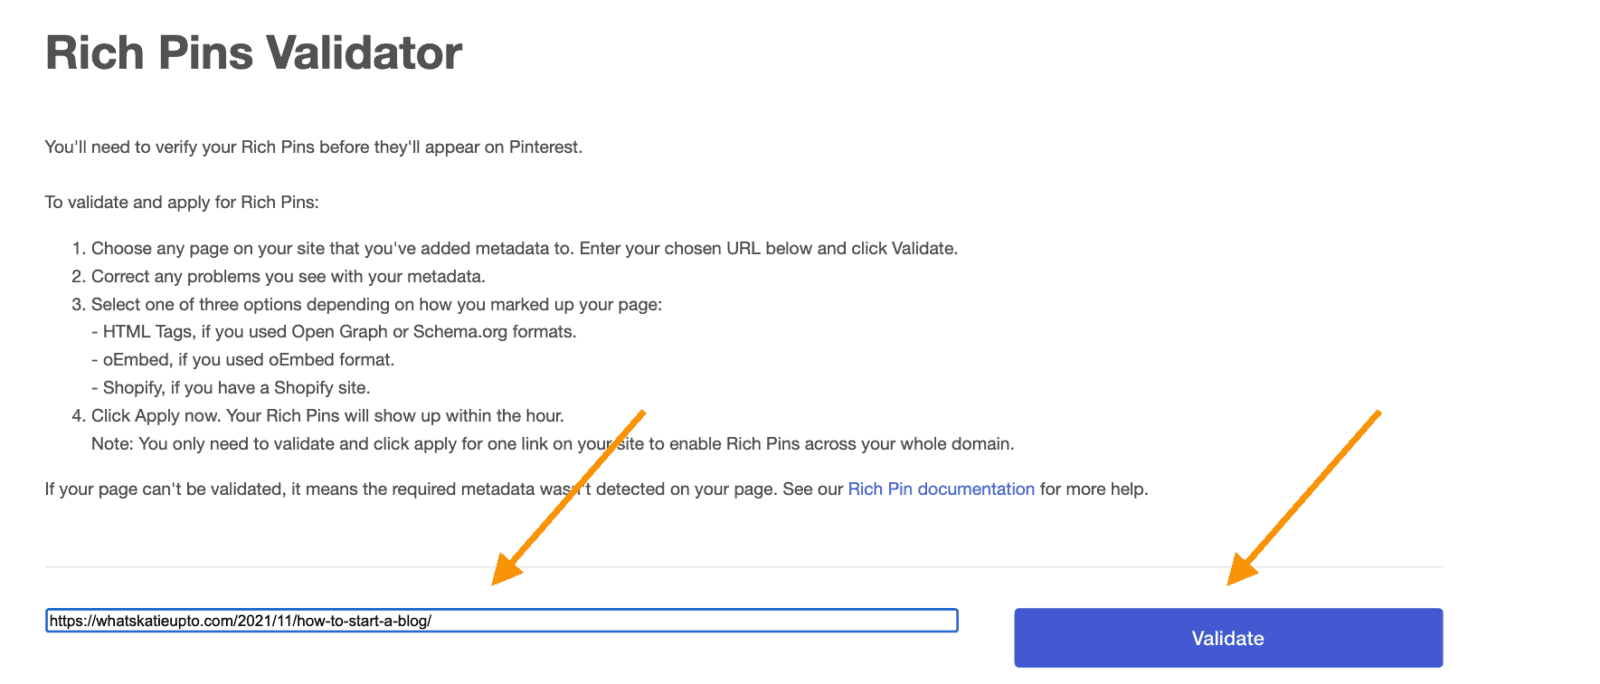
2. VALIDATE YOUR SITE (Rich Pin Validator)
Head over to Pinterest’s Rich Pin Validator here!
Once you are there, type in the URL of one of your Blog Posts. It’s really important that you don’t type in your homepage but a post on which you have created content.
Copy-Paste your URL and then click “validate”!
3. APPLY
Once you have validated your URL, you want to click “Apply Now” on the next page and “Apply now” again after that!
You are officially done!
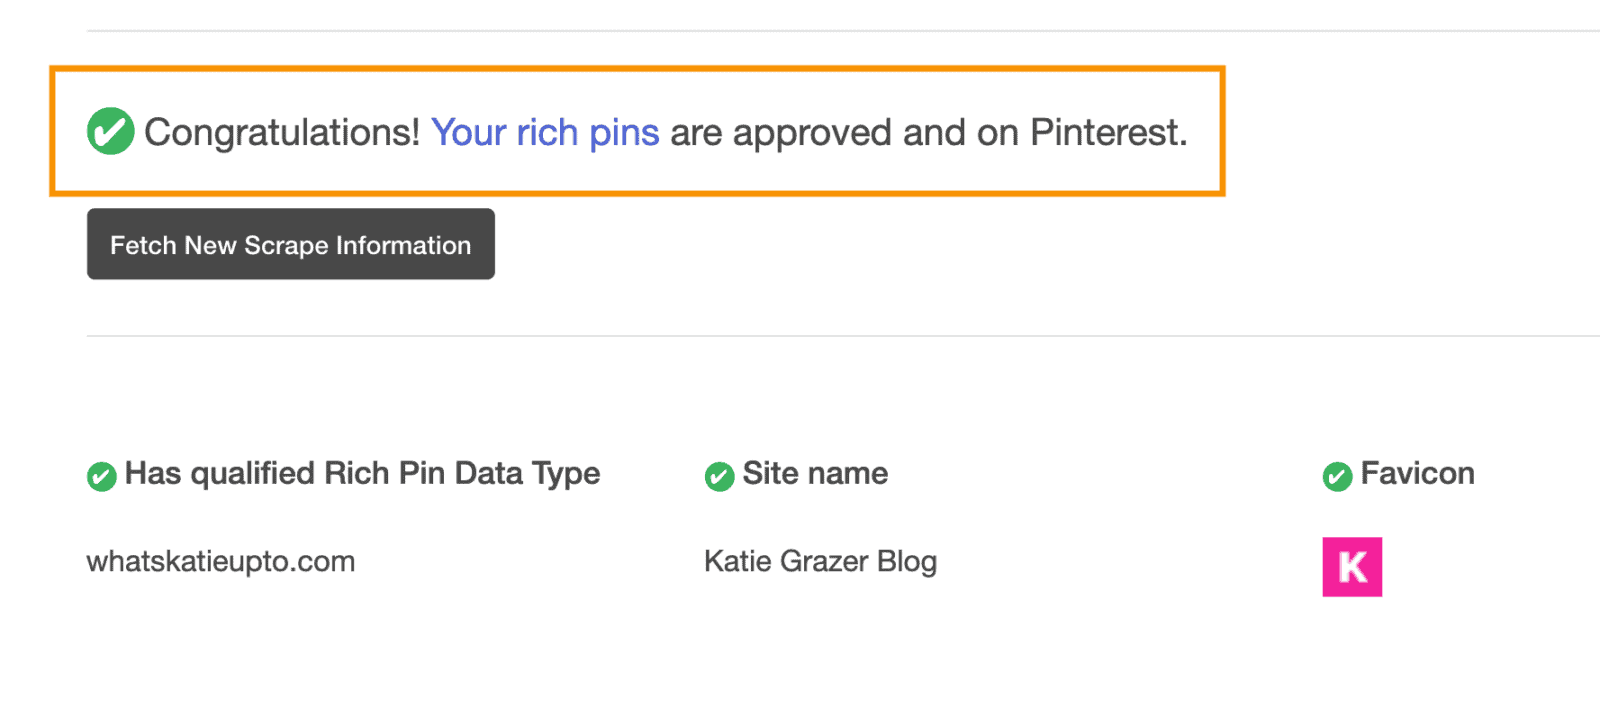
It usually takes Pinterest a few hours to days to set Up Rich Pins and approve your account. Once they approve your website, you will receive a notification via email that you were approved, and your pins are now distributed in the rich pins format! BOOM!
3. Different types of Rich Pins + how they work
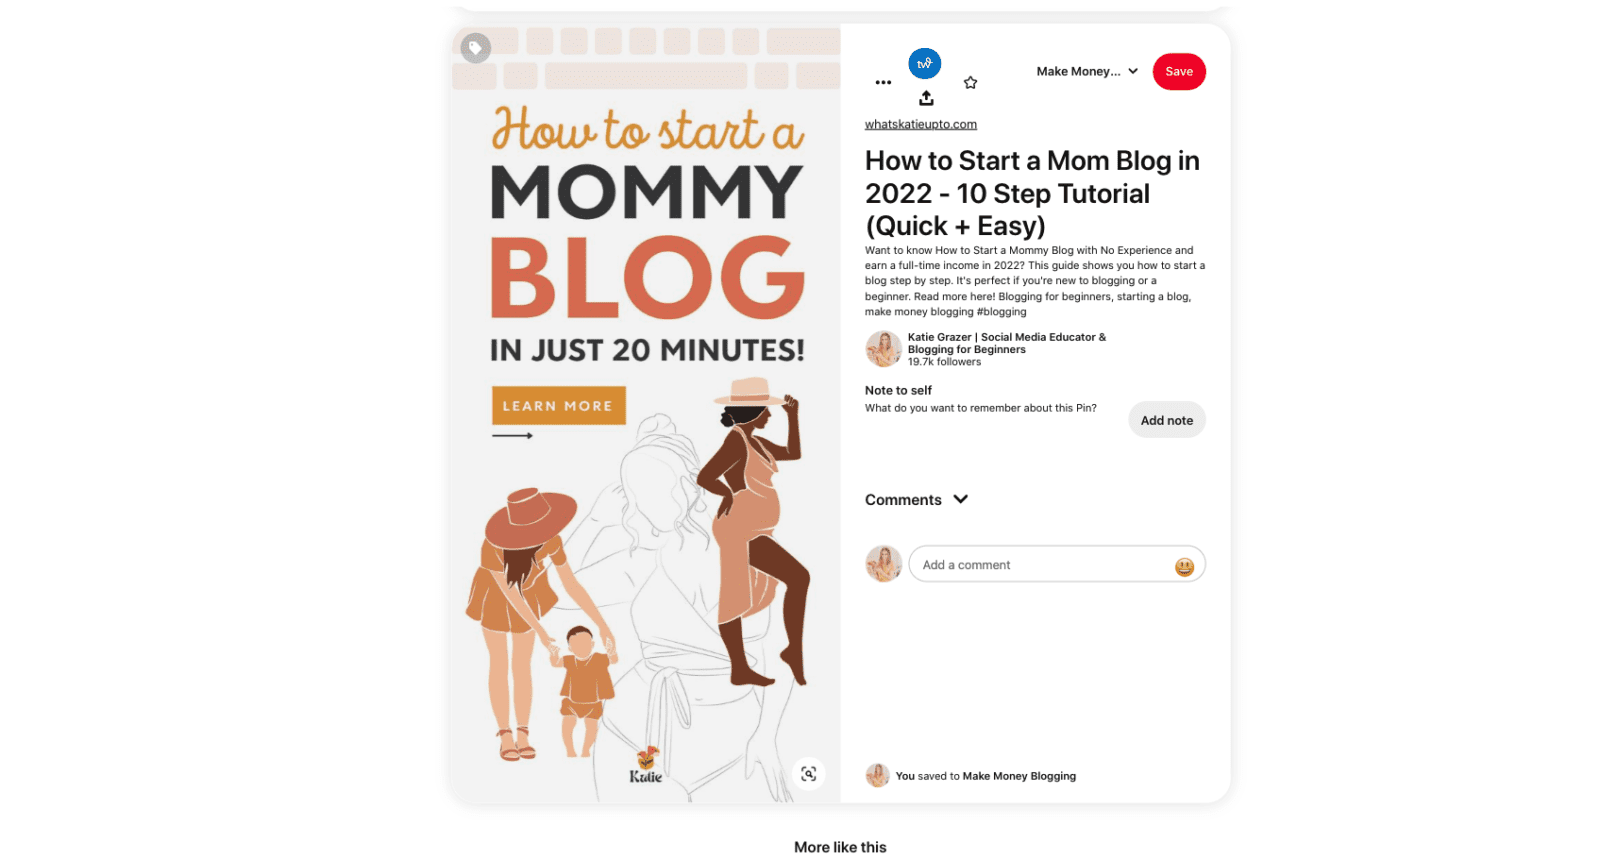
Article pins
So article pins are the most common pin on Pinterest.
These are static images that people saved on to the platform using the Pinterest Chrome extension or got created by businesses and bloggers who designed regular pin images.
If rich pins are enabled, Article Rich Pins also add the headline or title, a description once you go into a close-up, and the author of the article or blog post from your site.
The best thing about Article Pins is that they let users click over to your website. This is how bloggers are able to create massive traffic to their sites. Because a blog has many different articles, you can create many article pins leading back to your website.
When to Create Article Pins?
Article pins are still the best way for bloggers to grow their blogs because they include a direct link. In comparison, some other pin types don’t. So I do recommend you always create regular pins when you’re a business or a blogger.
That said, right now, Pinterest is pushing other newer pin types more than regular article pins. This means pins like video pins or story pins are shown more often and are taking away space in the feed from regular article pins.
This is not the best development for bloggers, as regular pins bring in a ton of traffic. But they do still work. I just recommend you also start creating different pin types as well to get more engagement.
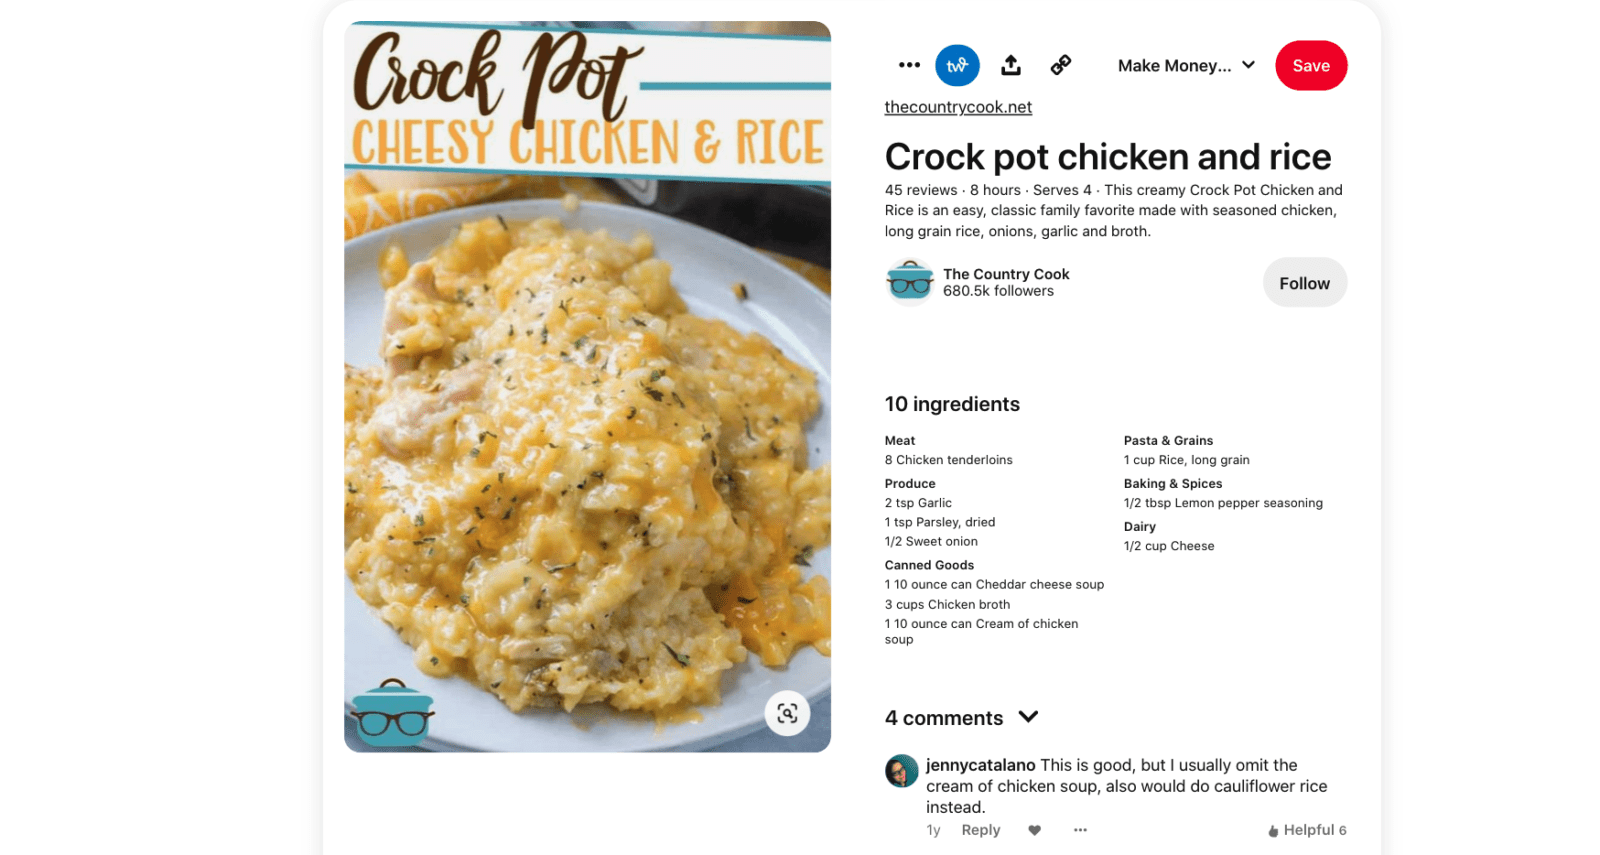
Recipe Pins
Recipe Pins are great if you’re a food blogger.
They add a title, serving size, cook time, ratings, diet preference, and a list of ingredients to recipes that you Pin from your site. Pinterest can also display if a recipe is paleo, vegetarian, vegan, or gluten-free.
Recipe Pins make it easy for Pinners to see exactly what a recipe contains and if they should have a go at it. Other than that, recipe pins at first look like regular pin images, but once you click on them, you can see the recipe, rating, and ingredients.
When to Create Recipe Pins:
Recipe Pins are very, very popular with food bloggers. So if you’re creating your own recipes, I highly encourage you to start creating recipe pins. As they work like regular pins, so you open the pin, and then if you click on the pin, you’re redirected to your site.
Plus, the additional rich pin information helps to boost your pin as Pinterest just has more information than if you would just use a regular article pin that would lead to your website. You can create recipe pins by adding code manually.
I guess it’s not that hard once you get used to it, but I actually recommend you invest in a paid recipe plugin. A recipe plugin adds the code to your blog post, and when you pin, the plugin will automatically turn your pin into a recipe pin.
My favorite recipe plugin is Tasty Recipes.
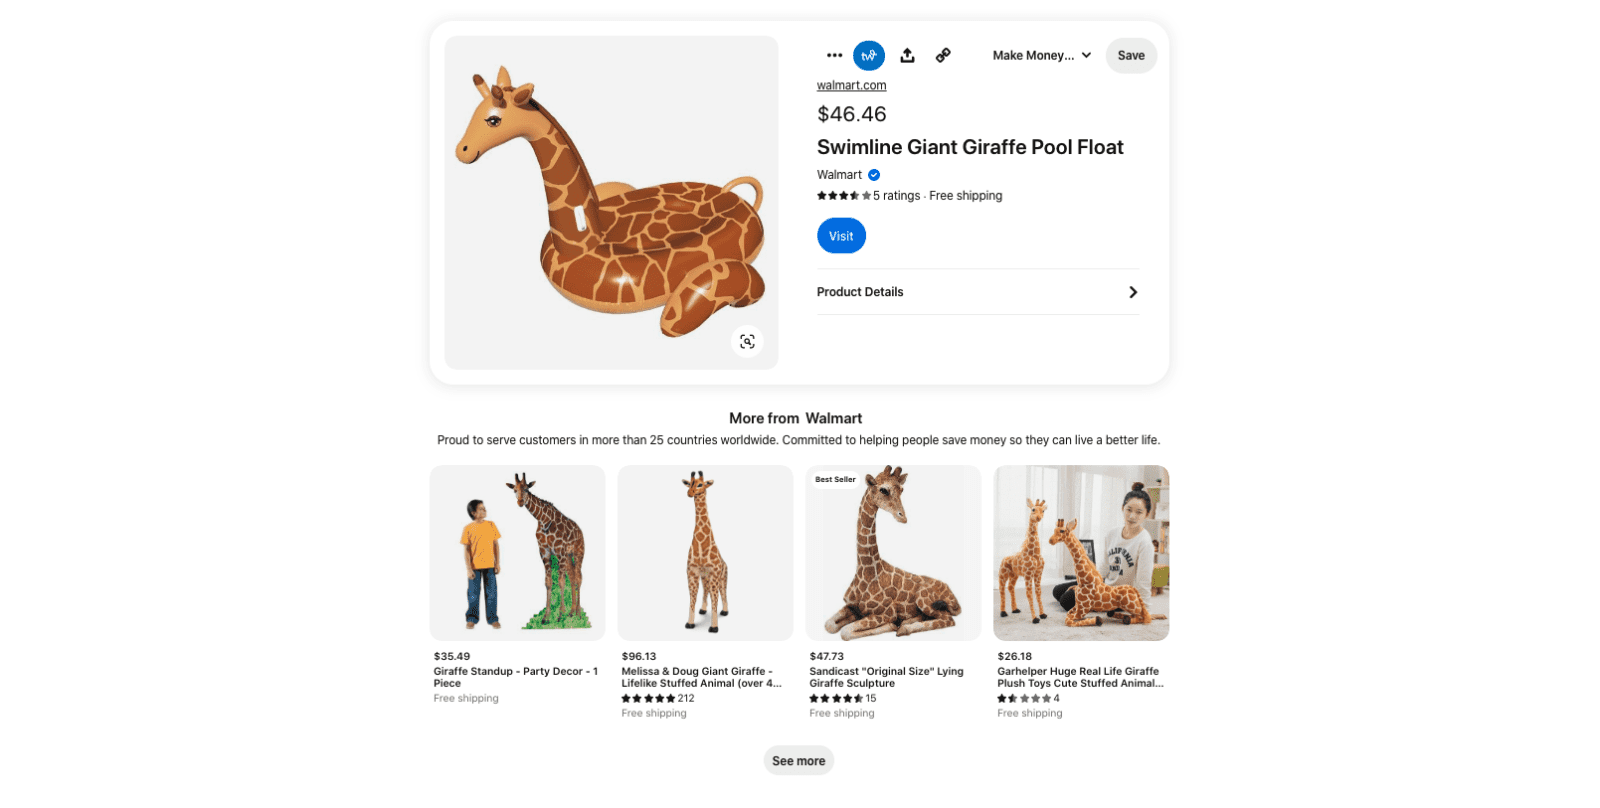
Product Pins (Buyable pins)
Ok, third, we have Product Pins. Product Pins lead people on Pinterest to your site, where they can purchase your products. As I said in the beginning, Product Pins are a type of Rich Pin, enriched with metadata and formatted to let people on Pinterest know they’re shoppable.
So they include pricing, availability, and location, as well as product title and description from your website. In some cases, your Pin might read “Bestseller” if, across different merchants, it’s one of the most purchased items within a Pinterest product category, or it might read “Popular” if it’s one of the most clicked products Pins within a product category on Pinterest.
You can create product Pins on your website or by using catalogs. And product pins must link to the product landing page where you can purchase the product.
When to Create Product Pins:
Product Pins are getting very popular on Pinterest because Pinterest is pushing e-commerce like crazy. So, if your business has an online shop,, you’ll love Pinterest.
As Pinterest is building out new features to make it super simple for people to get inspired and act on those inspirations by buying right on the platform, you can use this to skyrocket your sales. So you should use product pins if you sell digital or physical products in your online shop.
Pinterest now automatically integrates with Etsy and Shopify, so it’s easy not to connect your shop to Pinterest and set up your product pins.
4. How to Enable Rich Pins on Squarespace
If you want to enable Rich Pins on your Squarespace website, you’ll need to first install the Yoast SEO plugin. Once you’ve done that, you can validate your website’s URL on the Pinterest Rich Pin Validator.
Follow the same process as described for a WordPress blog above.
After you’ve been approved, your pins will be distributed in the rich pins format! BOOM!
5. How to Enable Rich Pins for Etsy
If you have an Etsy shop, you can enable Rich Pins for your products!
To do this, go to your Etsy shop’s admin and click on the “Marketing” tab. Then, click on “Pinterest.”
Next to where it says “Rich Pins,” click “Enable.”
You’re all set! Your Etsy shop’s products will now have Rich Pins.
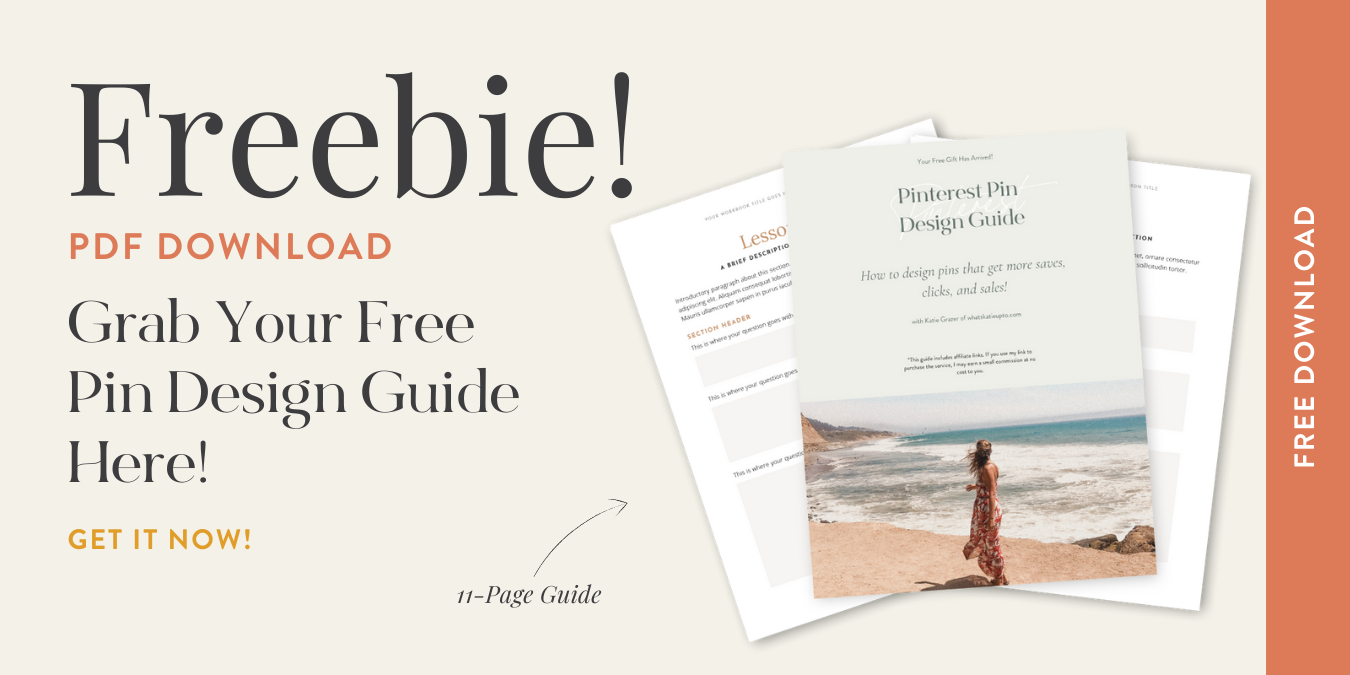
Also, don’t miss to download your FREE PDF GUIDE on “10 Easy Ways to Improve your Pin Designs” here:
6. How to Enable Rich Pins for Shopify
If you have a Shopify store, you can enable Rich Pins for your products!
To do this, go to your Shopify admin and click on “Online Store.” Then, click on “Themes.”
Find the theme you’re using and click on “Customize.”
Click on “Product Pages,” and then scroll down to “Show product recommendations.” Enable this feature, and then click “Save.”
Your Shopify products will now have Rich Pins!
7. How do you know if a pin has been enabled as a Rich Pin, and how can you tell if it’s working correctly?
If you’re unsure if your pins have been enabled as Rich Pins or if they’re working correctly, there are a few ways to check.
First, you can try searching for your website on Pinterest. If your pins appear with the extra information attached, then Rich Pins are working for you!
Another way to check is to inspect the code of one of your pins. To do this, right-click on a pin and select “Inspect.” Then, look for the section of code that contains “p:domain_verify.” If that section contains your website’s verification token, then your Rich Pins are working.
If you don’t see that section, or if you see an error message instead of a verification token, then Rich Pins are not working for you. In that case, you can try following the troubleshooting steps:
8. Troubleshooting tips for any issues that may occur with Rich Pins.
If you’re experiencing issues with your Rich Pins, there are a few things you can try to troubleshoot the problem.
Validation Error
First, check to see if the Rich Pin validator tool is showing any errors. If so, try to fix those errors and then resubmit your URL for validation.
If you don’t see any errors in the validator tool, but your Rich Pins still aren’t appearing, try clearing your cache. This is especially important if you’ve recently made changes to the markup on your site.
Still not seeing your Rich Pins?
Pinterest Rich Pins Bugs
If you’ve tried the troubleshooting steps above and you’re still not seeing your Rich Pins, please let Pinterest know by filing a bug report. Include as much information as possible, including the URL of your website and a link to your Pinterest profile.
Related:
- How to use Tailwind to skyrocket your Blog Traffic through Pinterest
- The Ultimate Pinterest Guide A-Z
- 6 Life Saving automation Tools for Social Media
Also, don’t miss to download your FREE PDF GUIDE on “10 Easy Ways to Improve your Pin Designs” here:
Disclosure: *If you purchase a product or service with the links that I provide I may receive a small commission. There is no additional charge to you! *


