To hide Pinterest pins in your blog post can be a very useful little strategy if you are creating multiple pins per blog post or if the pin design is effective but does not suit your blog branding.
There is a very easy trick to hide Pinterest pins in your blog posts using HTML, so if you are using WordPress or any other blog where you can add code to your site you will be victorious ????????
So, let’s dig into this short tutorial on how to hide your Pinterest Pins in no time!
Also, don’t miss to download your FREE PIN PDF GUIDE on “10 Easy Ways to Improve your Pin Designs” here:
Step 1: Create your Pinterest Pin
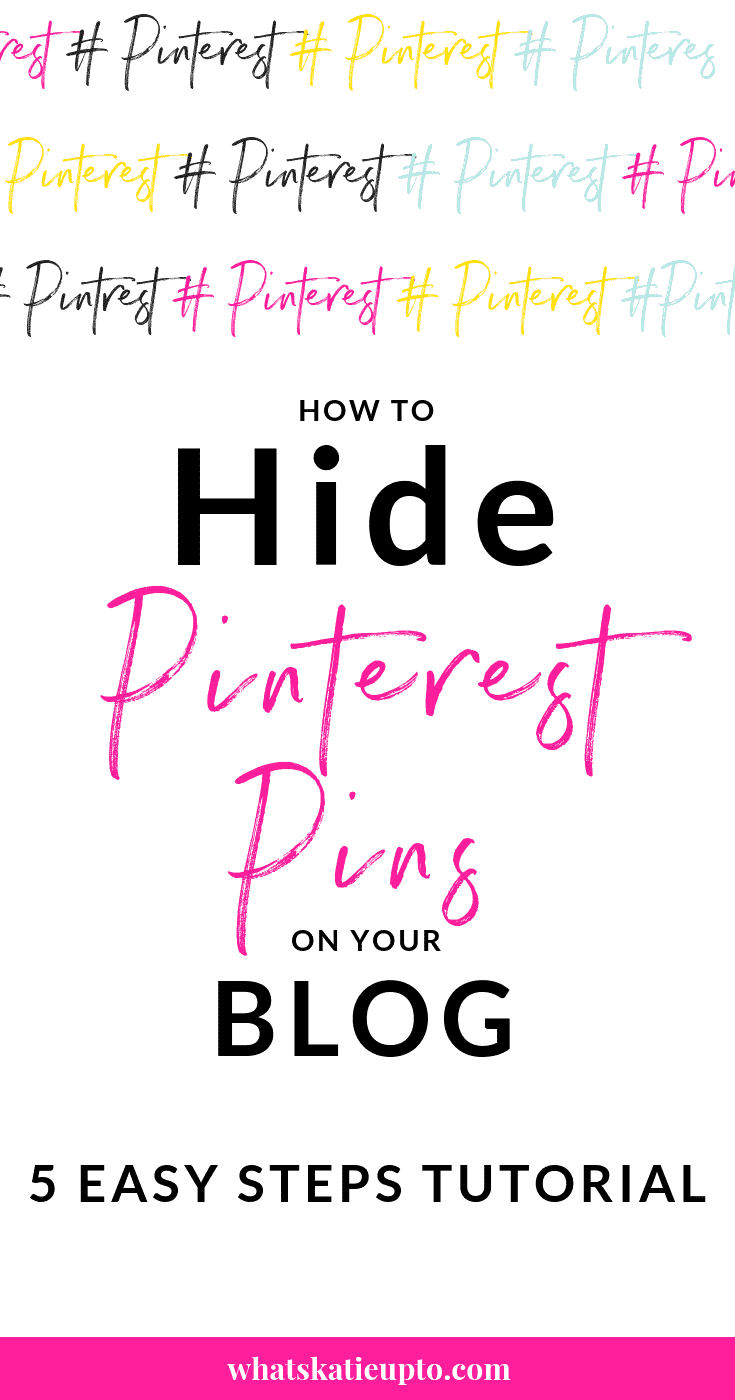
Personally, I am using Canva to create gorgeous Pin images such as the one below:
Step 2: Upload your Pin to your Media Library
Head to your new blog posts > Add Media > press Upload
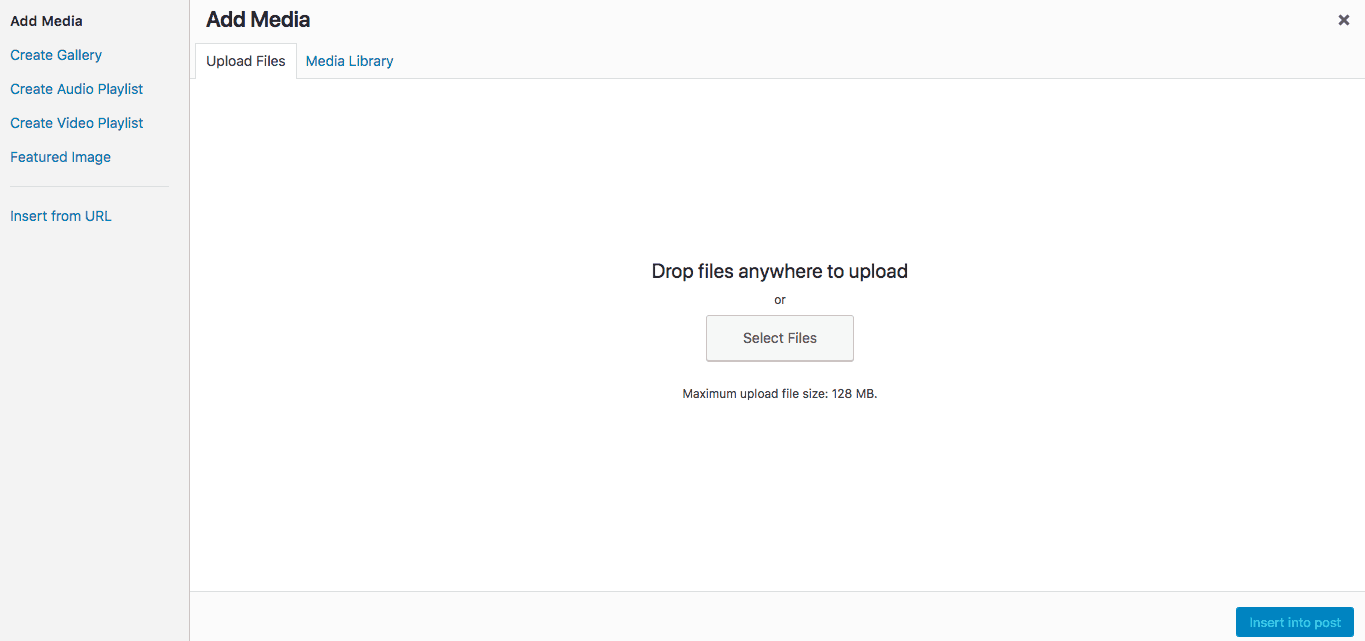
Step 3: Add the pin to your post
Press add Media > Choose your Pin > Press “Insert into Post”
Step 4: Switch to HTML Code
In the right corner of your editor, you can switch from the visual view to a text view.

- Visual is the view which makes it easy to write a post in WordPress and it’s how the post will be displayed once its published.
- Text view shows the HTML code of your blog post content.
This is an example of how an image is displayed in HTML:
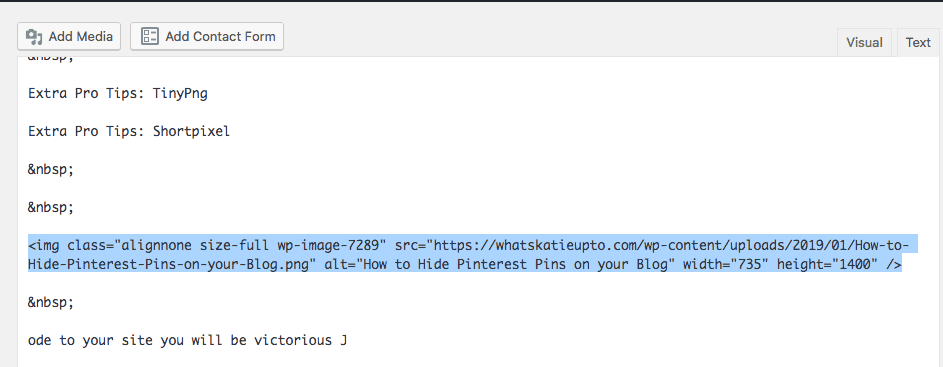
-> Pro Tip. Highlight the piece of content you want to find in your visual editor, then switch to the text editor and it will appear highlighted in your text editor as well. If you have a bunch of text, images, and code going on, this will make it easier to find the correct piece of code!
Step 5: Insert the small code snippets
To hide a pin in your blog post, please highlight the image in visual mode, then switch to text mode to identify the correct piece of HTML code for that pin.
Add the following code to the beginning of your image code (no blank):
<div style=”display: none;”>
Add the following code at the end of your image code (no blank):
</div>
Here is how your pin code should look like before and after:
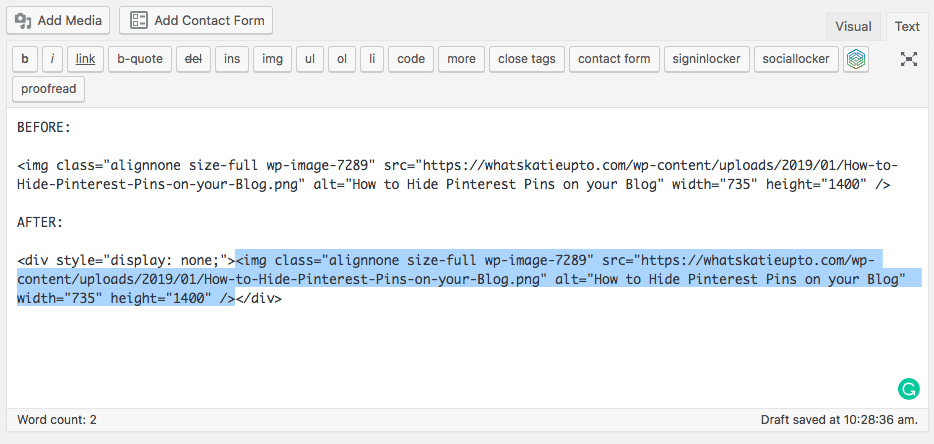
After you have finished adding these shortcode pieces to your image code please switch back to your visual view and check if it worked.
Your pin should be hidden and not show anymore. Please go ahead and press your “Pin it” button from your Pinterest Chrome extension or your Social Sharing Buttons to test if the pin appears when you want to share it.
Bravo, my friend that’s it!
To hide Pinterest images is really simple once you figured out the technical details and I love doing it especially when I create multiple pin images for blog posts.
As we never really know which pin will resonate the most with our audience it can absolutely make sense to create multiple pins and then track which one performs best.
Here are some additional pro tips:
-> Extra Pro Tip: I am using a free Tool called TinyPng to reduce the size of my images everytime before I upload them to WordPress. This will keep your Blog small and it’s also an SEO factor.
-> Extra Pro Tip: I am using Shortpixel to optimize my images once they are uploaded to my WordPress Blog. In order for your site to be optimized for SEO (Search Engine Optimization), your site must load fast. Even though it’s just one factor, image size matters in the loading time of your site. Shortpixel compresses your image and improves your website performance by reducing the image size. Sounds complicated, I know but it’s a MUST, FULLSTOP!
-> For more helpful Blogging Tools, please head over to the Resources Page HERE!
Other related Pinterest posts:
Leave me a comment if you have any question and I would love you to share the post on your social media if it helped you. It means a lot!
xx Katie
Psssst. Did you already grab your Free Pinterest PDF Guide? Having beautifully designed Pinterest Pins is one of the key success factors on Pinterest. Download it for free below 😉

